Help Center
How can we help you?
General Help Topics
Syncing your products and orders with PrintKK ensures smooth order fulfillment and automatic tracking number updates. Below is the step-by-step guide on how to manually sync your products and orders with PrintKK.
How to Sync Products Manually
If you're looking to sync products manually from your store to PrintKK, follow these steps:
Step 1: Connect Your Store to PrintKK
Ensure that your store is connected to PrintKK. Go to the “Stores” section in your PrintKK dashboard and choose the store you want to sync products for.
Step 2:Go to Your Product List
In your “Stores“, click on the “Product Number” for your store.
Step 3: Import Not Synced Products
Switch on the “Import not synced products from {your platform}” toggle. This will initiate the import of products that aren’t yet synced with PrintKK.
Step 4:Refresh the Page
Once you've toggled on the option, refresh the page to load the latest data.
Step 5:Filter and Select Unsynced Products
In the Status bar, filter the products that are marked as “Not Synced”. Choose the product you want to sync with PrintKK and click the “View” button.
Step 6:Choose Design for Your Product
Click the “Choose Design” button to select an existing design and bind it to the product. You can either choose a pre-uploaded design or create a new one.
Step 7:Repeat for Other Products
Continue this process for any other products or variants you need to sync.
Step 8:Review Product Listings
Double-check the product prices, descriptions, and images in your store to ensure they match those in your PrintKK account. This ensures consistency across all your platforms.
Step 9:Sync Complete
Once the sync is complete, your products will be fully integrated with PrintKK. “Refresh Data” in your store, and new orders for these products will automatically sync with PrintKK.
How to Sync Orders Manually
If you already have orders placed and need to manually sync them with PrintKK (for example, if the product wasn’t originally fulfilled by PrintKK), follow these steps:
Step 1:Ensure Sync Button is Enabled in Your Store
Make sure the sync feature is turned on in your store settings.
Step 2:Click on “Refresh Data”
Click the “Refresh Data” button in your PrintKK dashboard to sync the orders.
Step 3:Locate the Order
Find the corresponding order in your store’s order list.
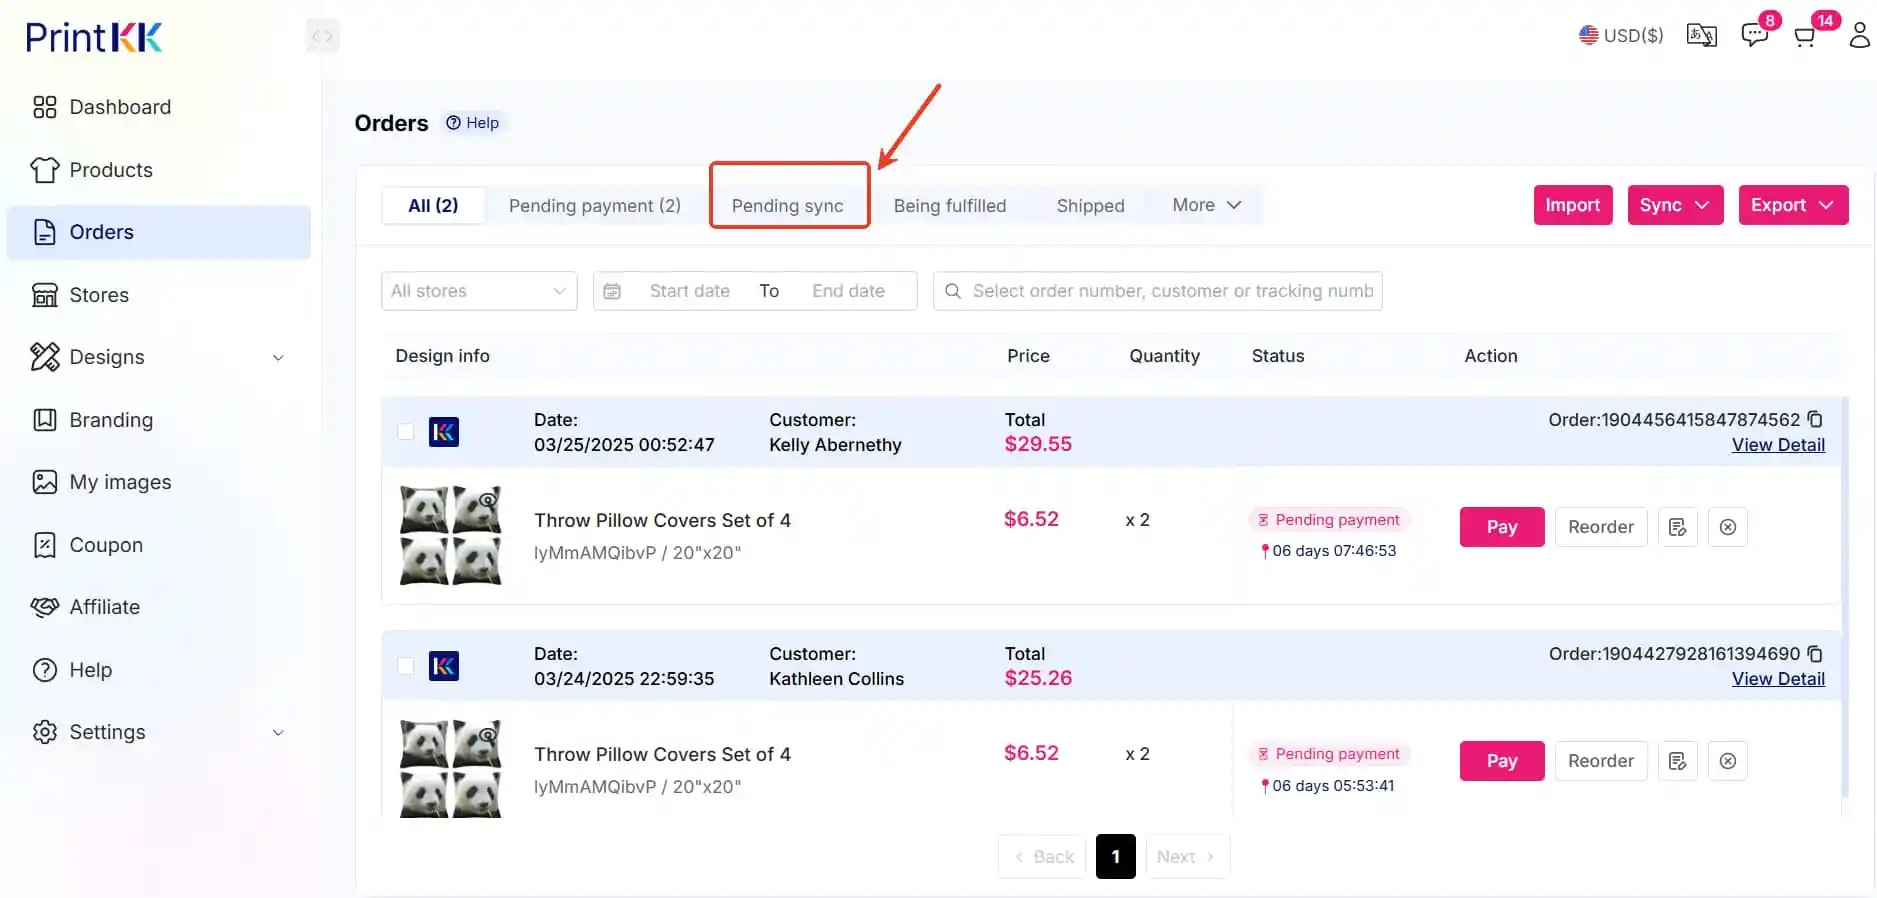
Step 4:Filter Orders by “Pending Sync”
Filter the orders by “Pending Sync” to find the ones that need to be synced.
Step 5:Sync the Order
Click the “Sync” button on the right side of the order you want to sync.
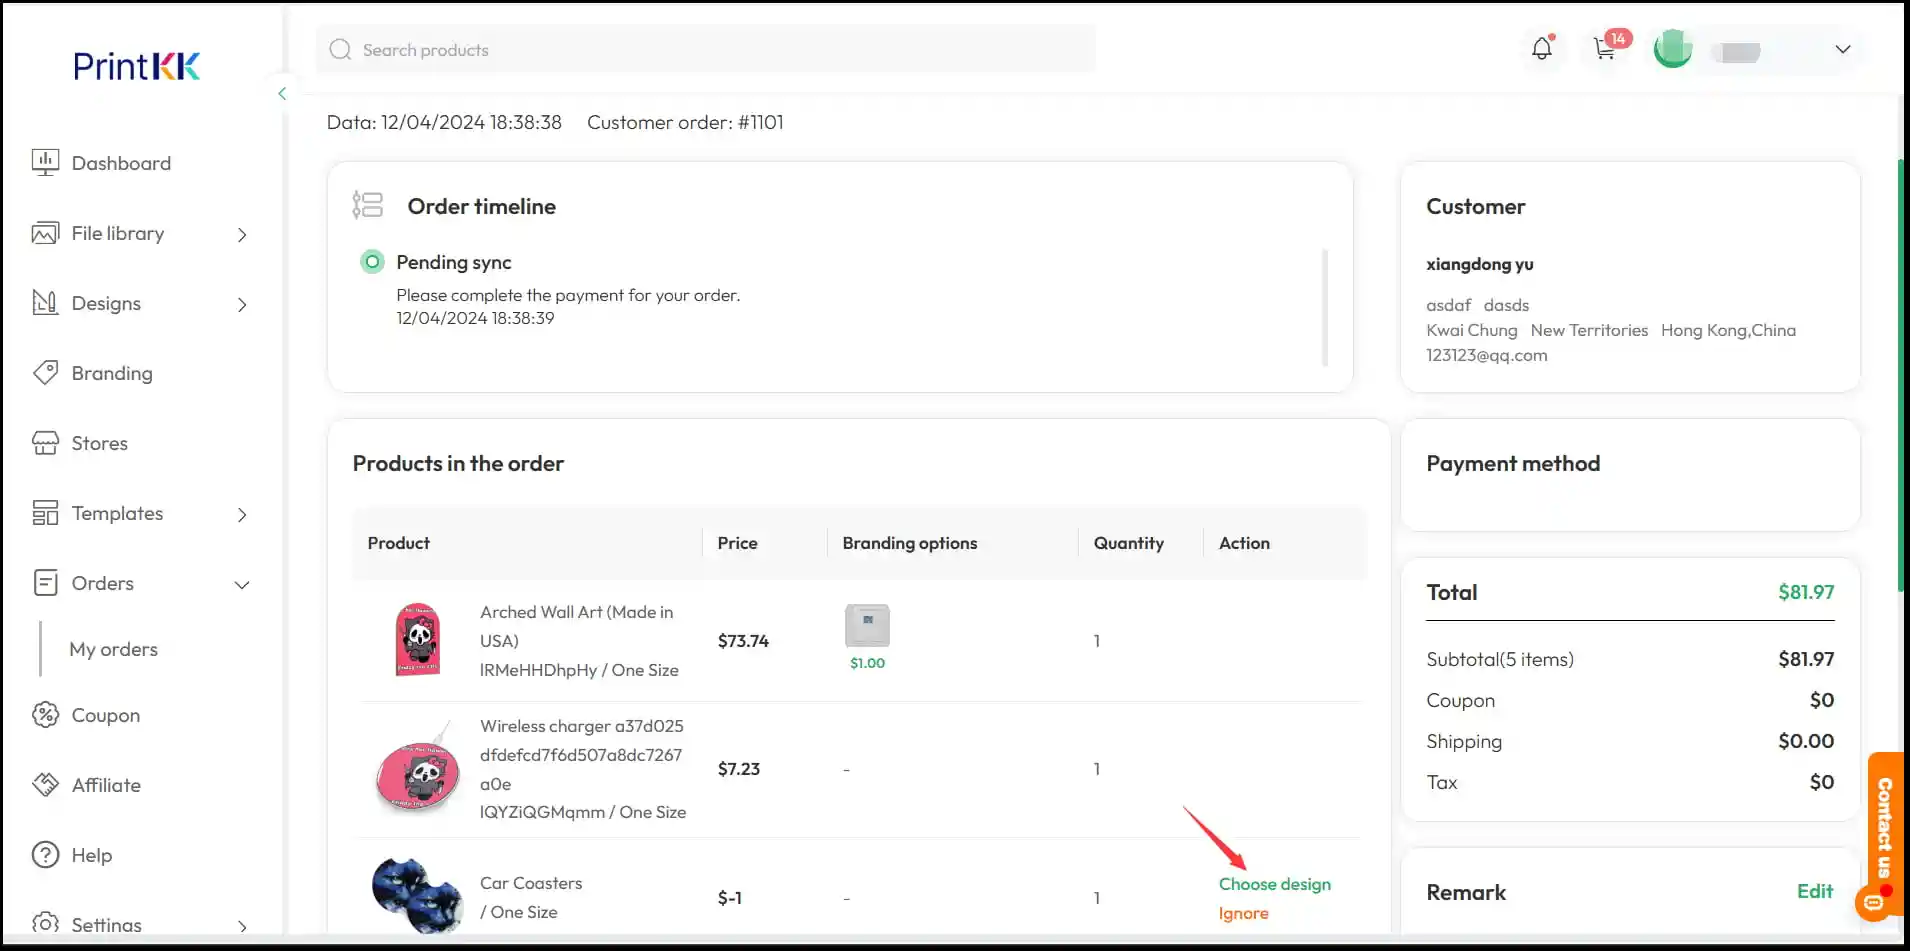
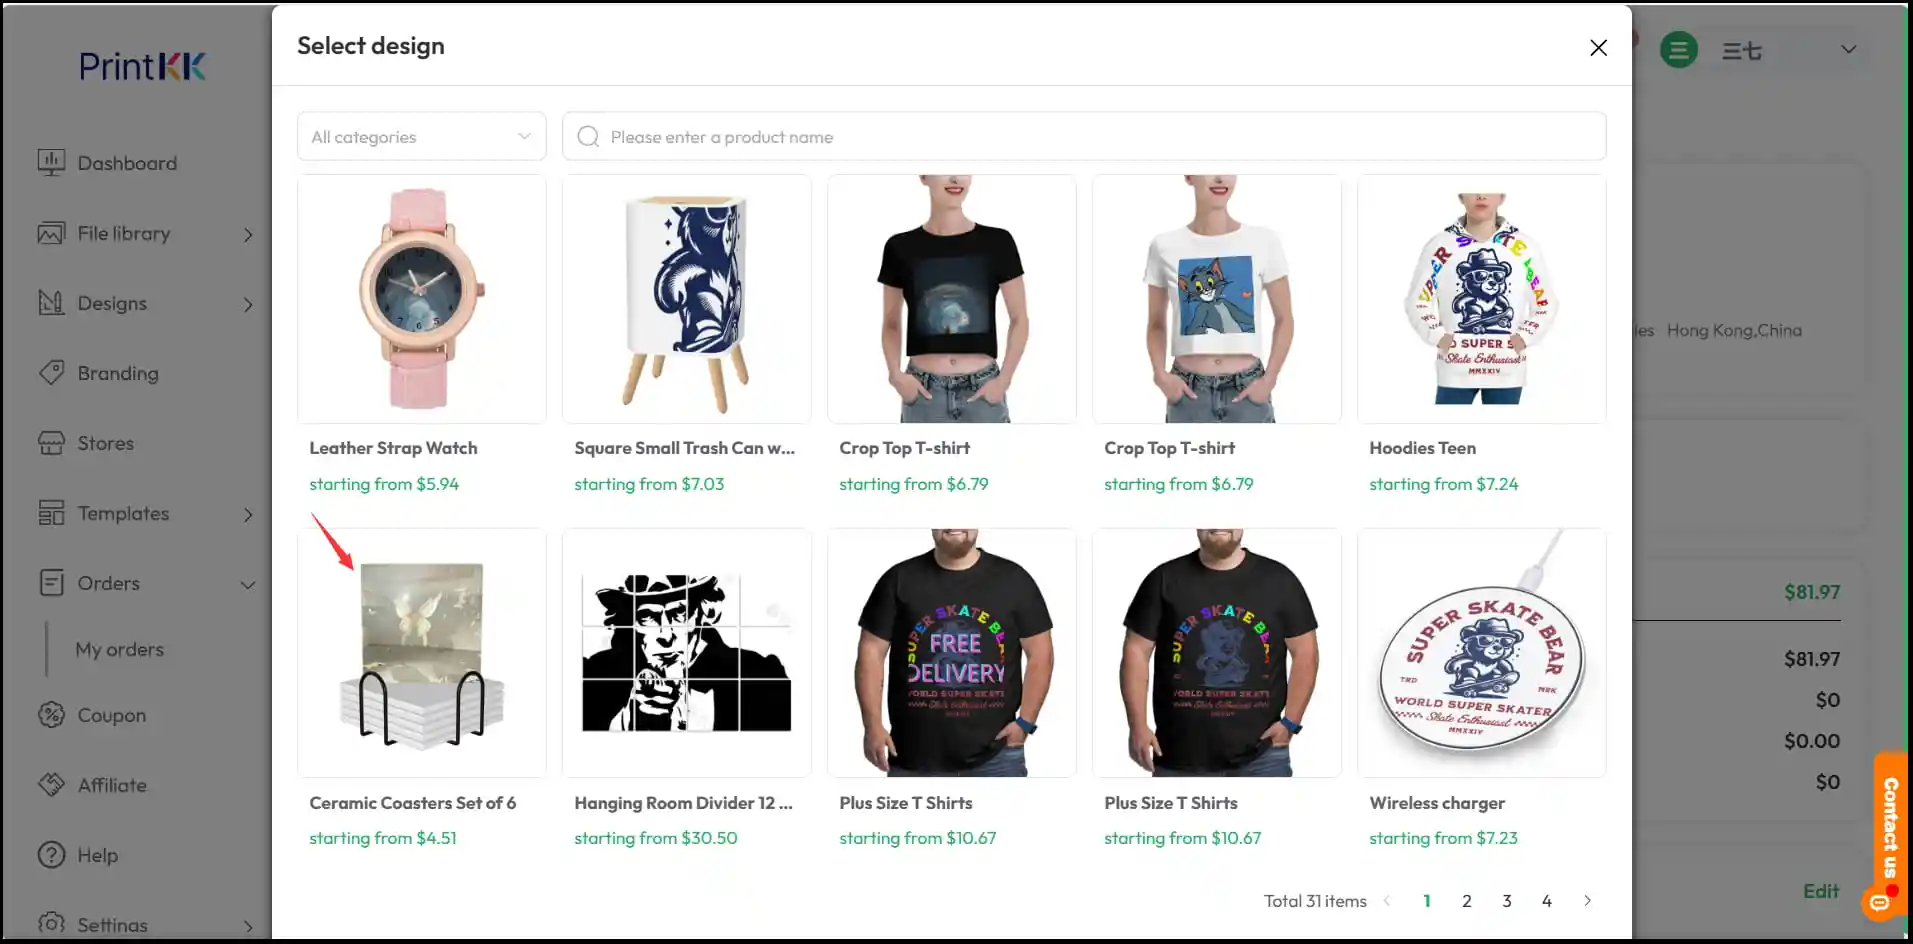
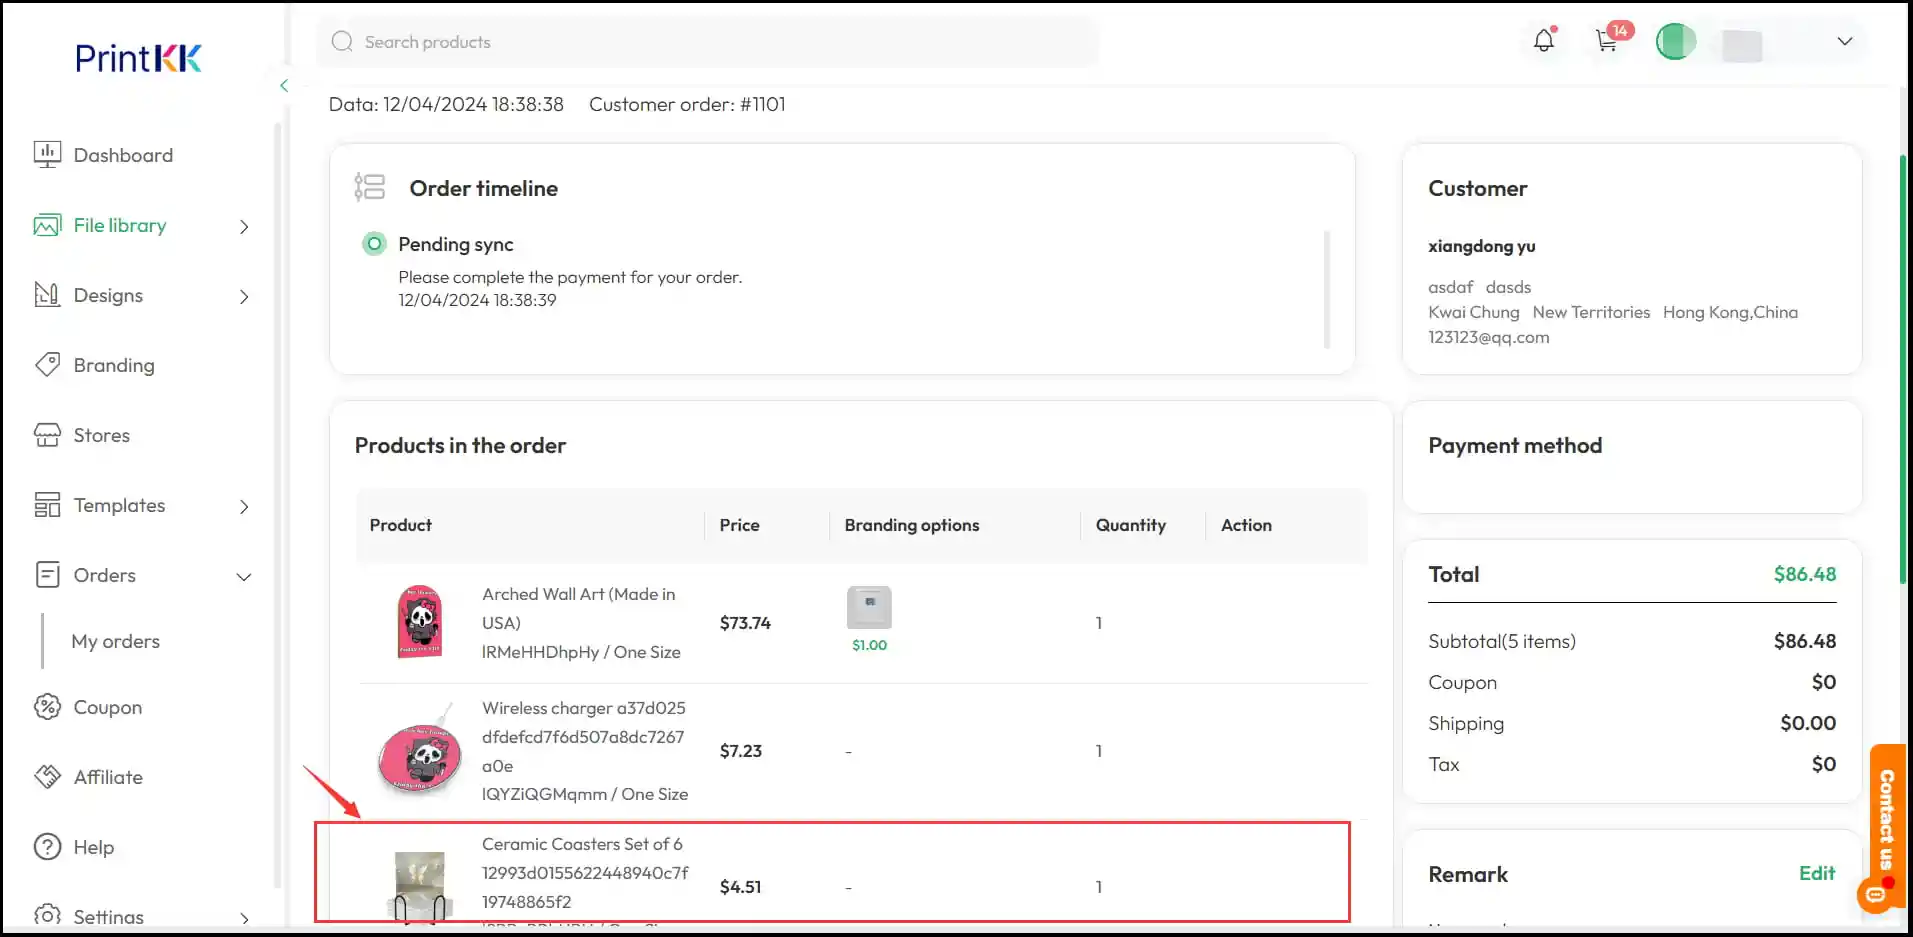
Step 6:Choose the Design for the Order
Click “Choose Design” to select an existing design and replace the original design, if necessary.
Step 7:Repeat for Other Orders
Repeat the process for any other orders that need to be synced.
Step 8:Finalize and Pay
After syncing the order, complete the payment. Once the payment is processed, the tracking number will automatically sync to Shopify or Etsy.
Step 9:Future Orders
After completing the sync, any future orders for this product will automatically sync with PrintKK and apply the chosen design, streamlining the order fulfillment process.
Important Notes
Currently Available for Shopify and Etsy:
This functionality is currently available only for Shopify and Etsy stores. We are working hard to expand this feature to more platforms in the near future.
Automatic Fulfillment:
Once products and orders are synced, future orders will be automatically fulfilled with the selected design, making the process seamless.
Need Help?
If you have any questions or need assistance, please don’t hesitate to reach out to us at [email protected]. Our support team is here to help you with any concerns!